I struggled to find a way to accurately drill holes right near the edge of the rings for the Water Droplet project. I decided what was needed was a custom finger plate. A finger plate's main use is for drilling holes centered in the side of round stock. I have a nice one that I made many years ago. The two important aspects of the finger plate are the vee groove for holding the round stock and the drill guide. A clamping system is also built in. A rough plan was sketched and is seen in the photo below.

Two inserts are shown in the plan. The first will be made of acrylic and is used for aligning the mark on the metal. The second is a drill guide, essentially a tube to fit the drill diameter. I was not sure I could polish the plastic sufficiently to make a useful optical device. Consequently, this piece was made first. An old towel rack handle was cut up to provide a 3" length of square cross section acrylic. A 1/2" length was cut off of this piece.
The 1/2" length was held in the four jaw chuck on the Sherline. The end was faced and then 3/8" was reduced to 0.249". This small cylinder and end were sanded with 1500 grit paper and then blue polish was used to polish the sides and the face. It was difficult to determine if the polishing was sufficient since the far end was still rough cut. The part was held in a 1/4" collet and the other end was faced. The corners of the square where chamfered with a small file. This face was then polished as well. Looking through the device at the pencil marks on the rings indicates that more polishing is needed. The marks are visible, but are pretty fuzzy.
A new buffing wheel was put on the buffer this morning. It was charged with the blue buffing compound. The eyepiece was buffed on both ends. It now looks much clearer. The pencil marks are readily visible and would be easy to center. I won't blacken the ring or the center pip at this time.
The drill guide holder was manufactured next. A 1/2" X 1" block of steel was located and a 1" length was cut off with the bandsaw. The cut ends were faced on the lathe. It was held in the mill vise on parallels. The four-flute 5/16" end mill was used to cut the recess in 0.0075" increments one half at a time. The end mill did a very nice job and cut smoothly with minimal chatter. The 1/4" hole was drilled and reamed in the center of the recess to serve as the hole for the drill guide. Two holes were then drilled with a #21 drill and tapped 10-32. These two holes were set 1/4" in from the corners opposite the recess.
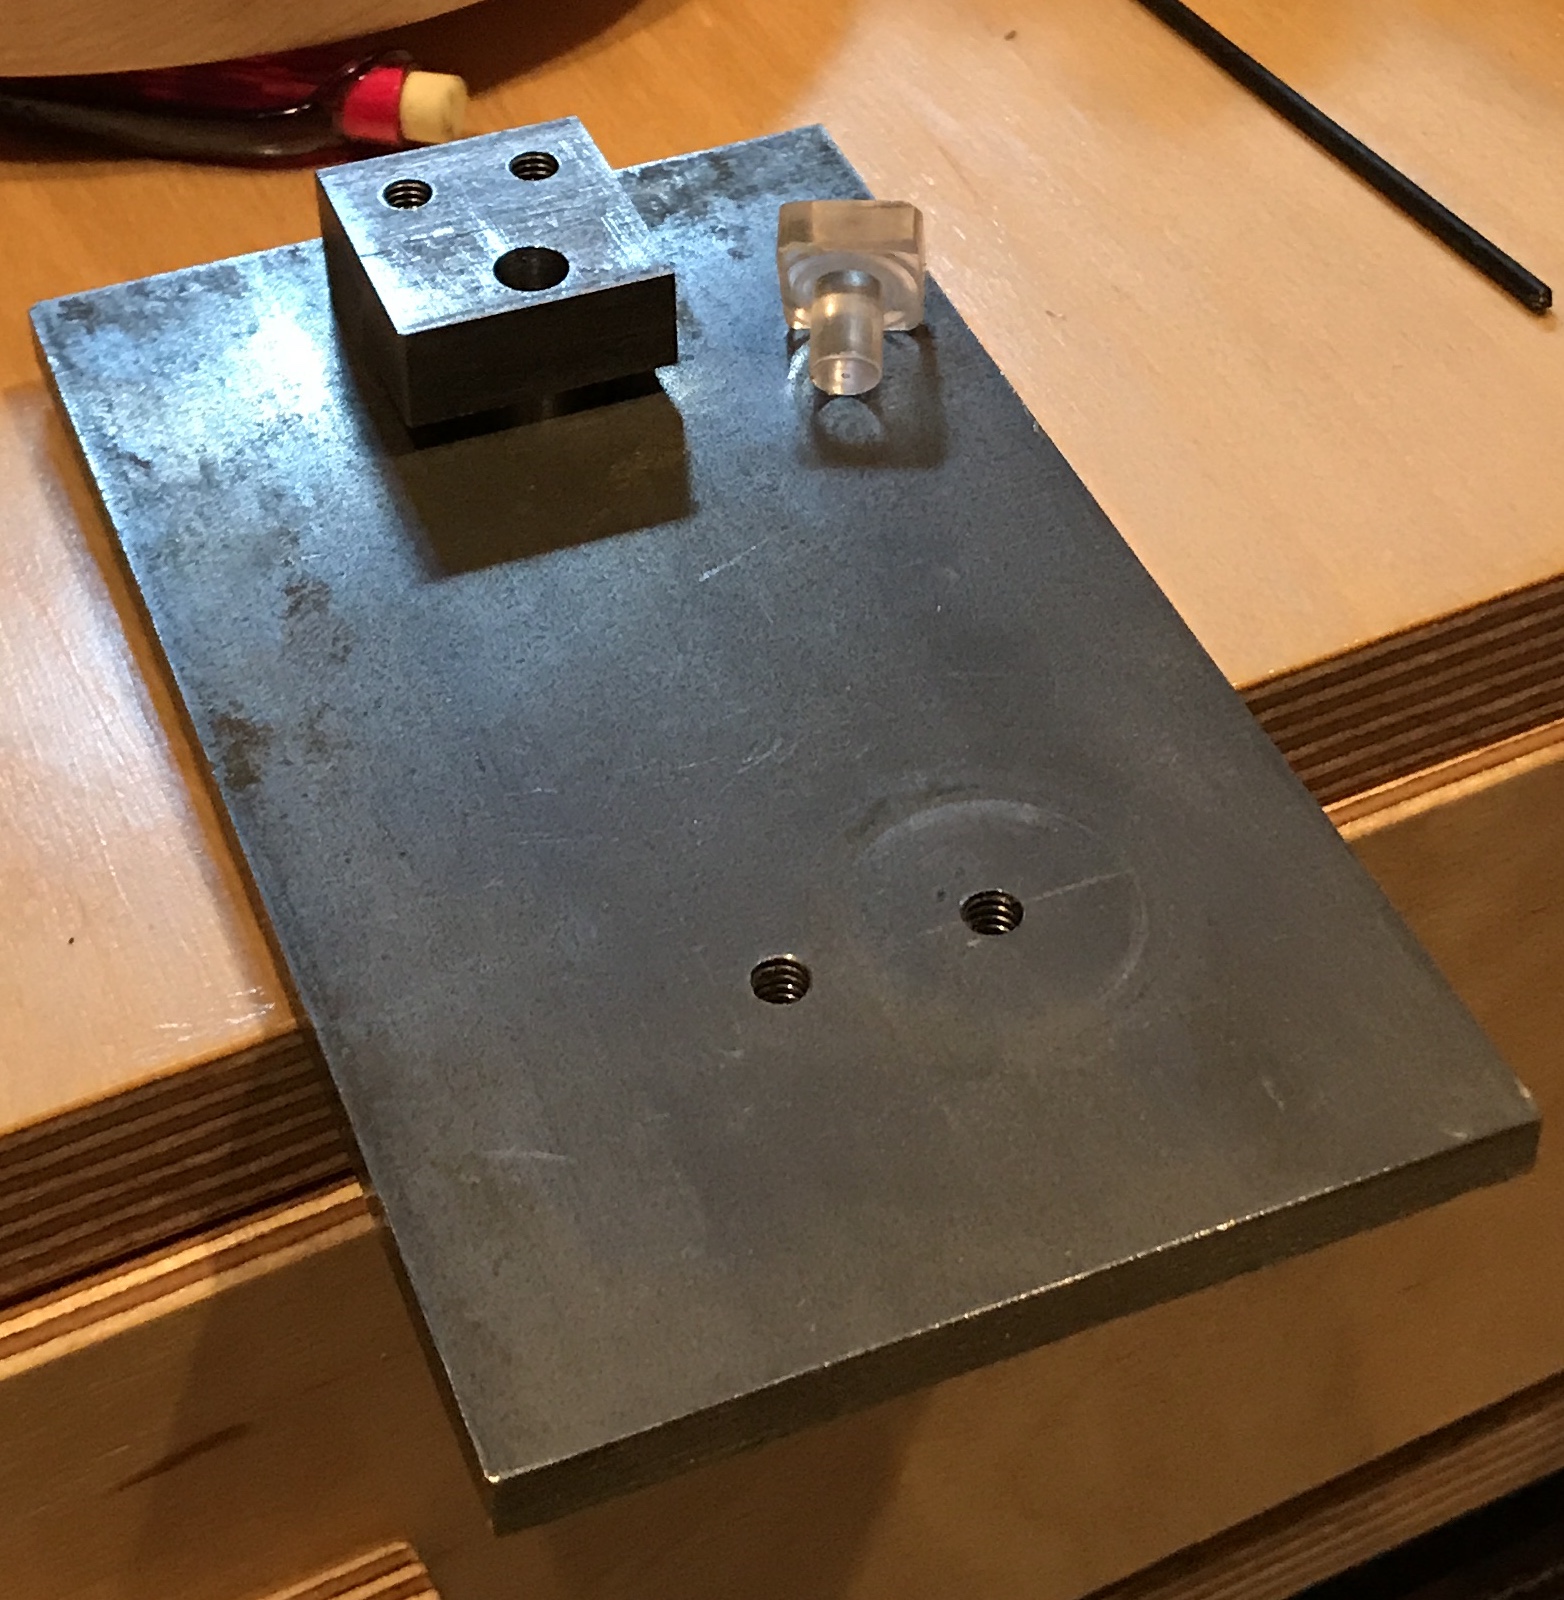
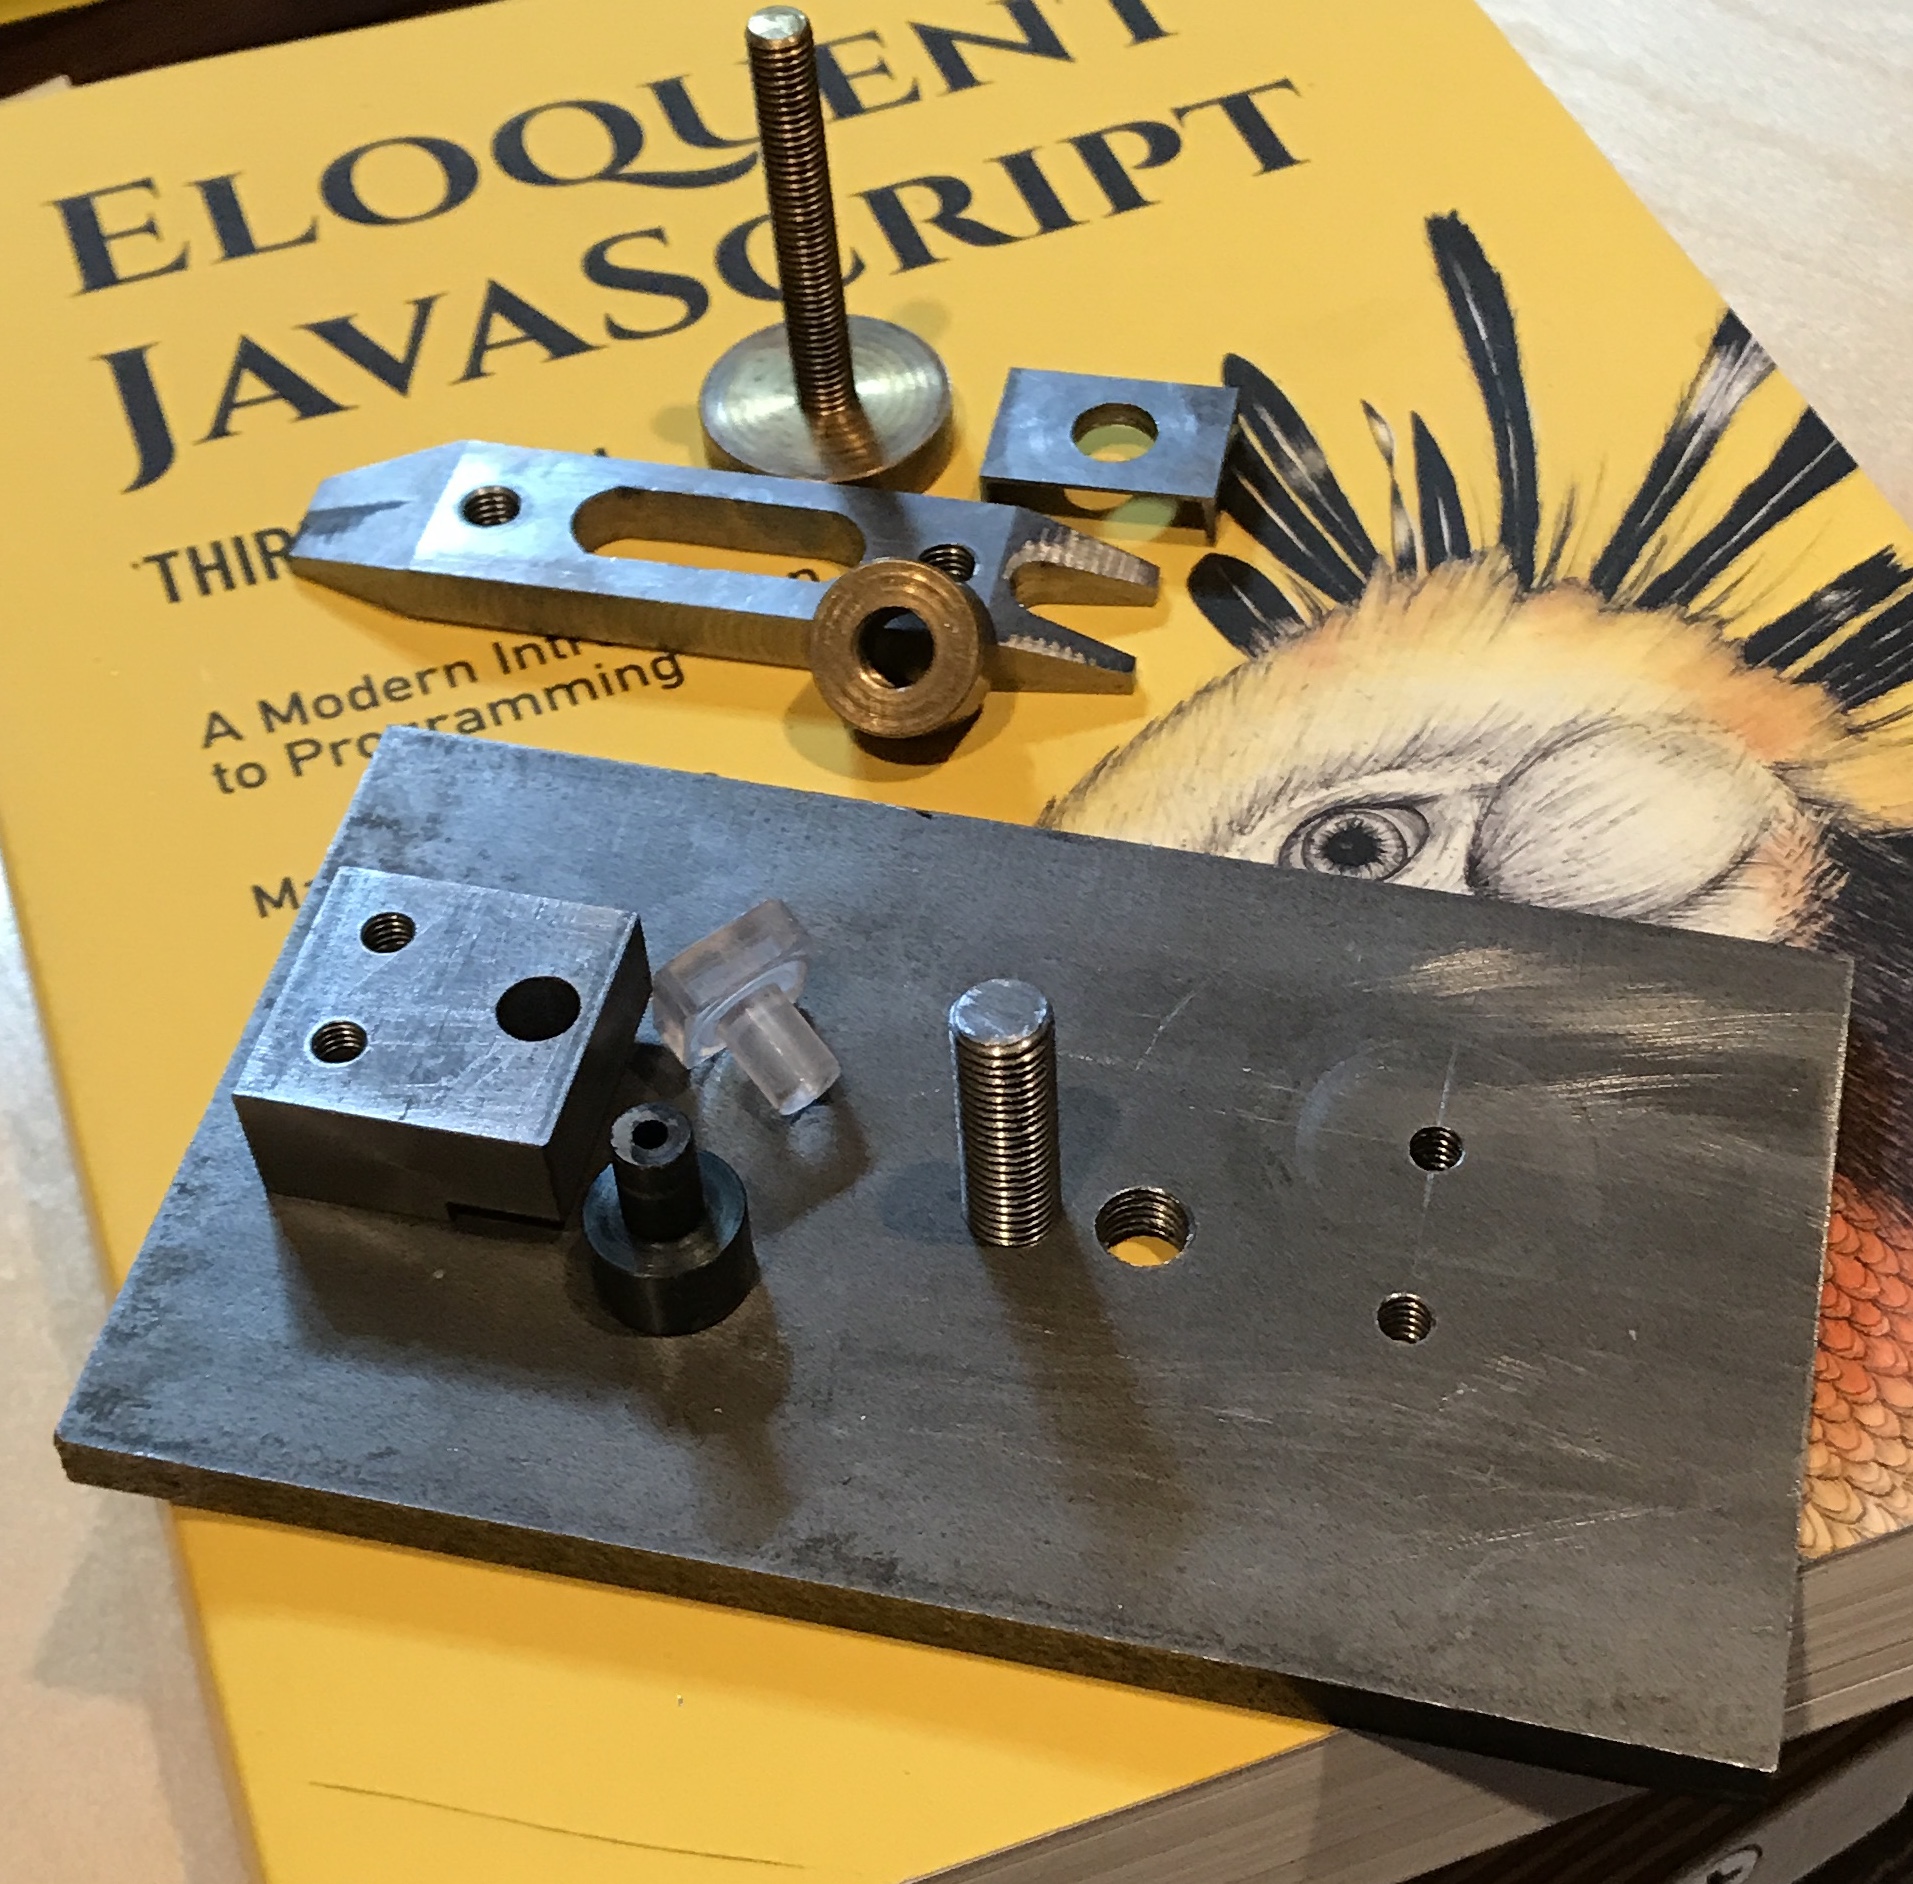
A 1/4" piece of steel was located for a base plate. It is about 3" X 4". It was used previously as a bending jig. One hole was marked with a punch and was drilled with a 7/32" drill to serve as a through hole. The drill guide was screwed to the base plate and the second hole was punched. The guide was removed and the second hole was drilled. The drill guide, base and eyepiece are shown below. The eyepiece was tried out in the drill guide. The center pip and ring will need to be blackened. It is difficult to discern how close the marks are to center and there is not sufficient light under the drill guide (even with the iPhone's light).
Both ends of the eyepiece were buffed again and produced a very clear view of a marked ring. The drill insert was made from a 3/4" length of 1/2" drill rod. One end was faced and reduced to 0.249" for 3/8". The end was chamfered and then placed in a collet. The other end was faced and the drill insert was drilled through with a #41 drill (0.096"). The drill insert was then hardened by heating to cherry red for a minute or so and quenching in motor oil. It was hard to a file.
A stud was made next. The old finger plate from where I am borrowing the clamp used a 5/16-24 stud. A 2" length of 5/16" drill rod was held in the garage vise as it has a vertical vee groove. It was threaded for most of its length with a 5/16-24 die. (It was quite the challenge to hold it tight enough so it didn't rotate.) The unthreaded end was cut off with a hacksaw and the threads cleaned up with the 5/16-24 die.
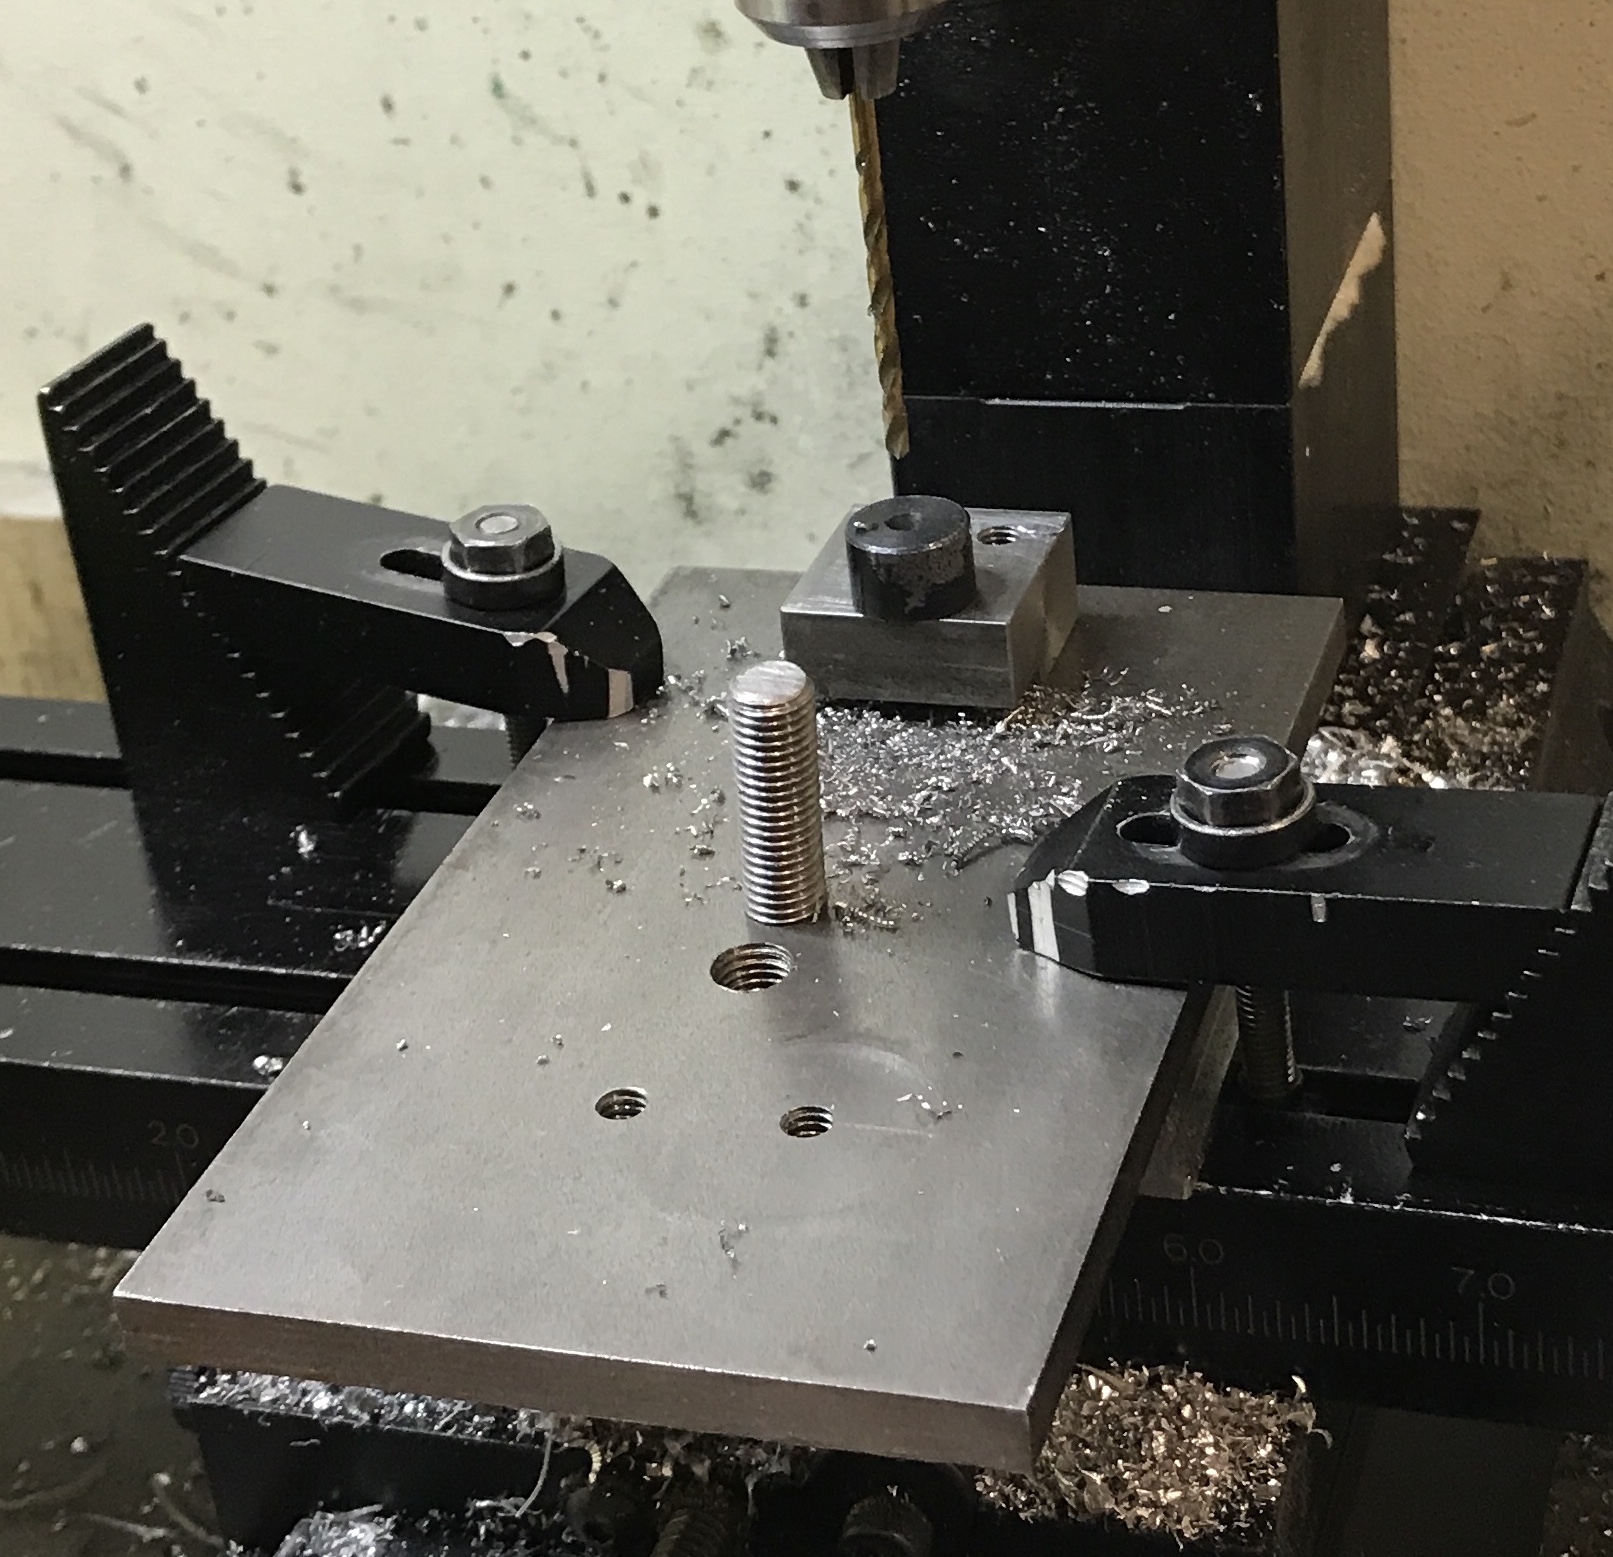
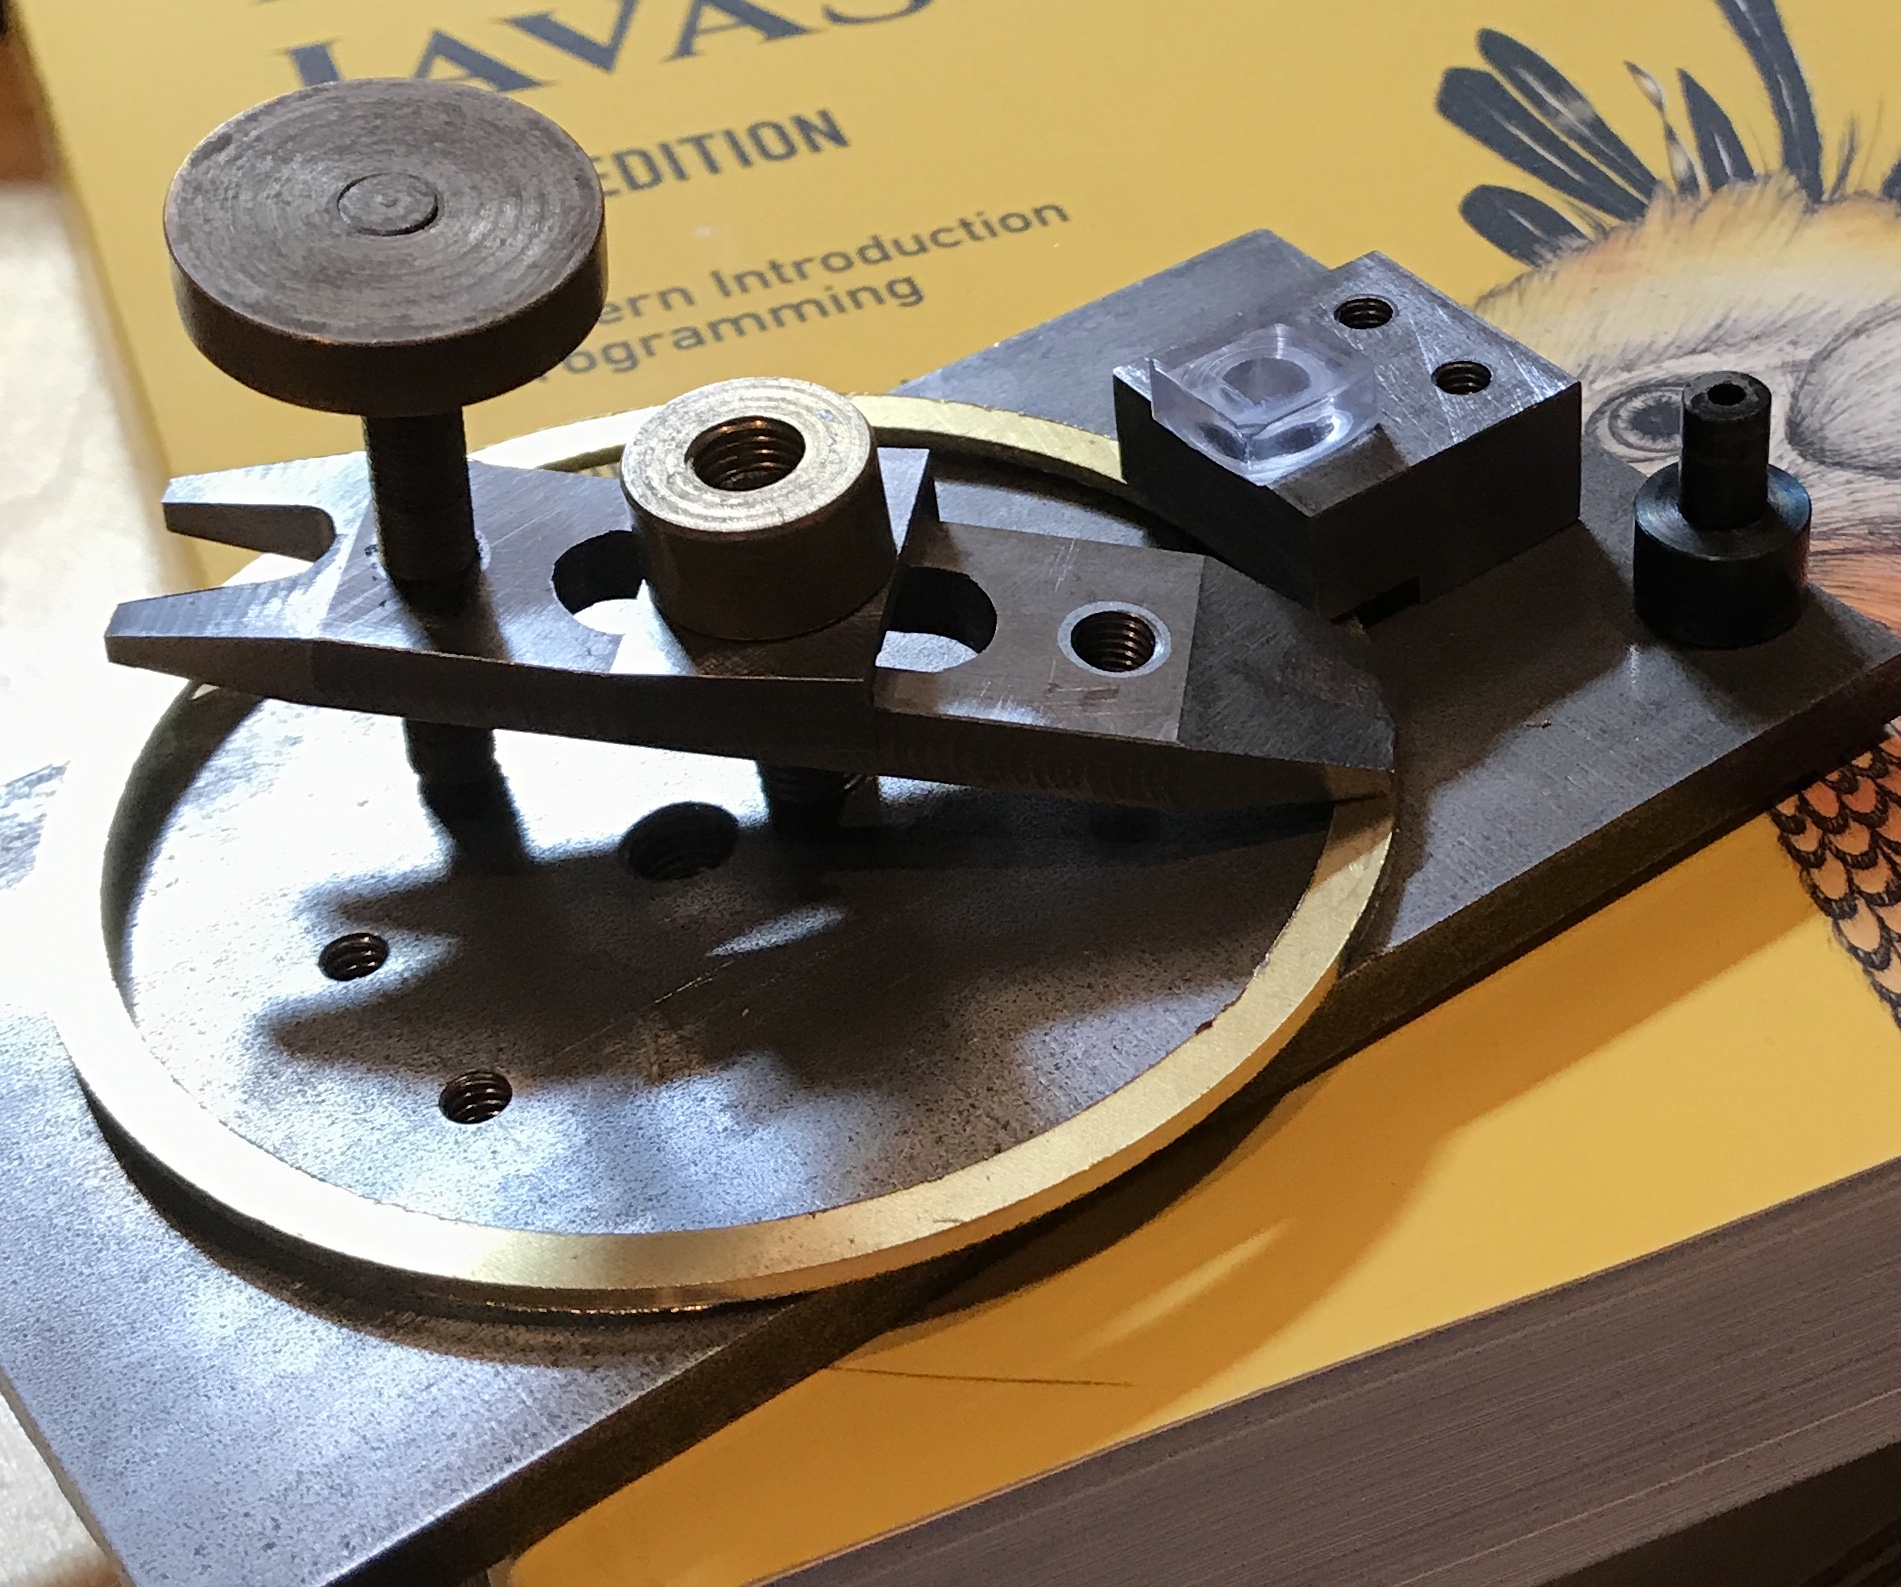
The last operation was making a hole for the stud. After checking a number of rings it became obvious that two stud holes would be needed. Consequently, two holes were marked out based on trials with different sized rings. The holes were drilled with an I drill and then tapped 5/16-24. Both holes were cleaned up. This completed the custom finger plate for drilling the rings of the water droplet. The picture below shows the completed custom finger plate with the clamping system from the old finger plate. The second photo shows a ring clamped in place.
I forgot one last detail. I drilled through the steel base plate with a 3/32" drill using the drill insert. The jig was clamped in the mill for the drilling. The drill press speed is too low for a drill this small.